Garlic Roasted Chickpeas
Highlighted under: Wellness Ideas
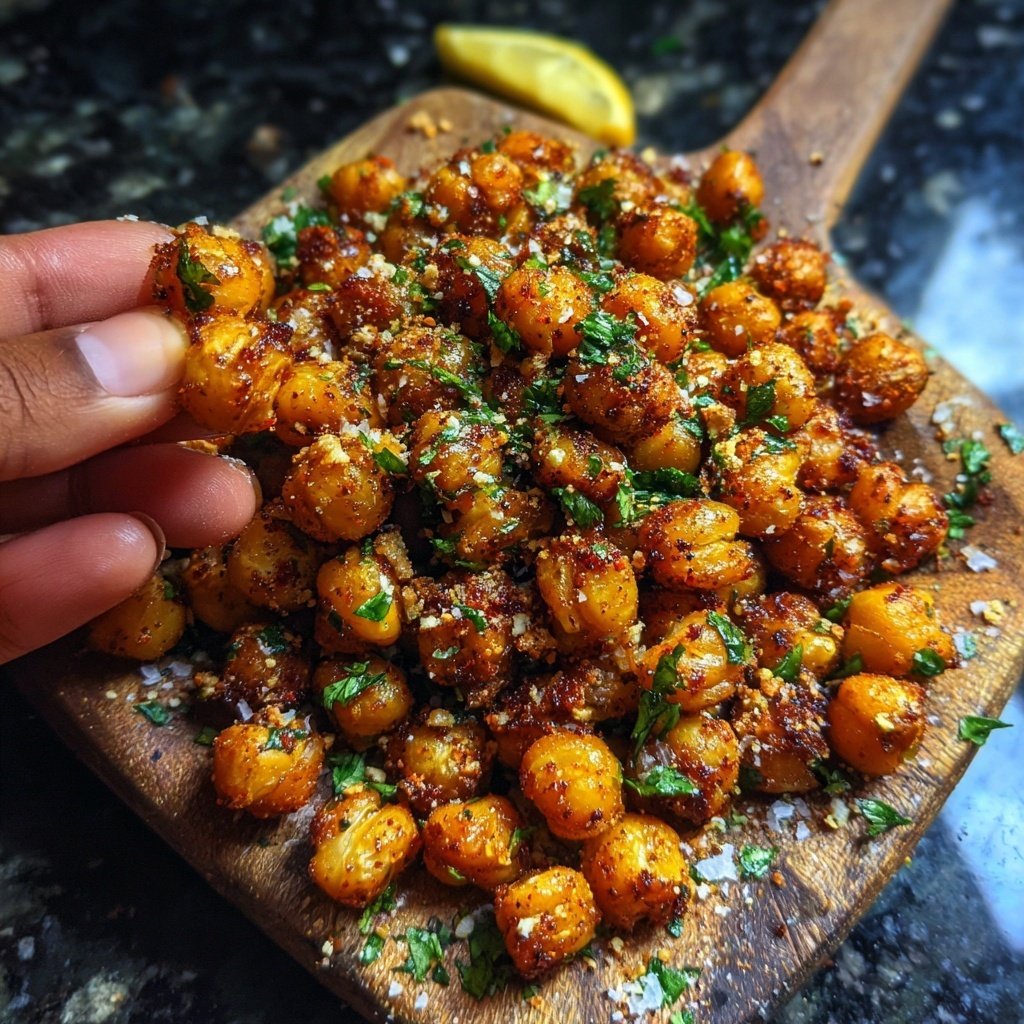
I absolutely love making Garlic Roasted Chickpeas as a healthy snack option. The crispy texture combined with the bold, aromatic flavors of garlic makes them so irresistible. Whether I’m binge-watching my favorite series or hosting a gathering, these chickpeas are a crowd-pleaser. In just a few simple steps, I can transform a can of chickpeas into a crunchy delight that’s both nutritious and satisfying. Plus, they’re incredibly easy to customize with your favorite spices!
When I first tried making Garlic Roasted Chickpeas, I could not believe how simple yet delicious they were. I tossed the chickpeas in olive oil, minced garlic, and my favorite herbs, then roasted them until they were golden and crispy. The aroma filled my kitchen and beckoned my family to gather around for a taste test.
One crucial tip I've learned is to make sure the chickpeas are thoroughly dried before roasting. This ensures they become extra crunchy rather than soggy. It's a game-changer that will elevate your snack game and make your friends ask for the recipe!
You'll Love These Chickpeas Because
- Crispy texture that satisfies your crunch cravings
- Bold garlic flavor with a hint of spice
- Nutritious and healthy snack ready in under an hour
The Importance of Properly Drying Chickpeas
One of the key steps in achieving that irresistible crunch with your Garlic Roasted Chickpeas is properly drying them before roasting. After rinsing, spreading them onto a clean kitchen towel allows excess moisture to be absorbed. Patting them down gently will further ensure they're dry. This reduces steaming in the oven, helping them turn out crispier rather than chewy, which is crucial for that delightful snack experience.
If you skip the drying step, you may find that your chickpeas don’t achieve that perfectly crisp texture. Instead, they might retain a soggy consistency. Since roasting is all about creating those golden, crunchy edges, this step is non-negotiable for any batch of roasted chickpeas.
Seasoning Variations and Enhancements
While the classic combination of garlic, paprika, and black pepper is delicious, don't hesitate to customize your chickpeas according to your taste preferences. Try adding spices like cumin or nutritional yeast for an extra layer of flavor. Dried herbs such as thyme or rosemary can impart wonderful aromas. Mix and match to find your perfect blend!
For an added kick, consider incorporating different types of hot peppers or even a dash of hot sauce before roasting. Alternatively, if you're looking for a more savory taste, smoked paprika delivers a warm, deep flavor that pairs beautifully with garlic. Remember to adjust the quantity based on your spice tolerance to ensure your roasted chickpeas remain enjoyable.
Storage and Reheating Tips
Once your Garlic Roasted Chickpeas have cooled completely, they can be stored in an airtight container for up to one week. It's important to ensure that they are fully cooled to avoid moisture buildup, which could lead to sogginess over time. A glass jar or a resealable plastic bag works well for keeping them fresh.
If you happen to have leftovers—and they’re sure to be a hit—re-crisping them is simple. Just pop them back in a preheated oven at 375°F (190°C) for about 5-10 minutes. This will revive their crunchiness and make them just as delightful as when they were freshly roasted. They’re perfect for snacking straight out of the container or adding a crunchy topping to salads or soups.
Ingredients
Gather these simple ingredients to create irresistibly crunchy garlic roasted chickpeas.
Ingredients
- 1 can (15 oz) chickpeas, drained and rinsed
- 2 tablespoons olive oil
- 3 cloves garlic, minced
- 1 teaspoon paprika
- 1/2 teaspoon salt
- 1/4 teaspoon black pepper
- Optional: 1/4 teaspoon cayenne pepper for heat
Mix and season your chickpeas for a delightful snack!
Instructions
Follow these simple steps to create your garlic roasted chickpeas.
Prepare the Chickpeas
Preheat your oven to 400°F (200°C). Spread the rinsed chickpeas on a clean kitchen towel and pat dry to remove excess moisture.
Season the Chickpeas
In a mixing bowl, combine the chickpeas with olive oil, minced garlic, paprika, salt, black pepper, and cayenne pepper (if using). Toss until the chickpeas are well coated.
Roast in the Oven
Spread the seasoned chickpeas in a single layer on a baking sheet lined with parchment paper. Roast in the preheated oven for 25-30 minutes, stirring halfway through, until golden and crispy.
Cool and Serve
Once roasted, remove the chickpeas from the oven and let them cool for a few minutes. Enjoy them warm or at room temperature!
Enjoy this healthy snack any time of day!
Pro Tips
- For extra flavor, try adding herbs like rosemary or thyme during the seasoning step, or toss in your favorite spice blend.
Serving Suggestions
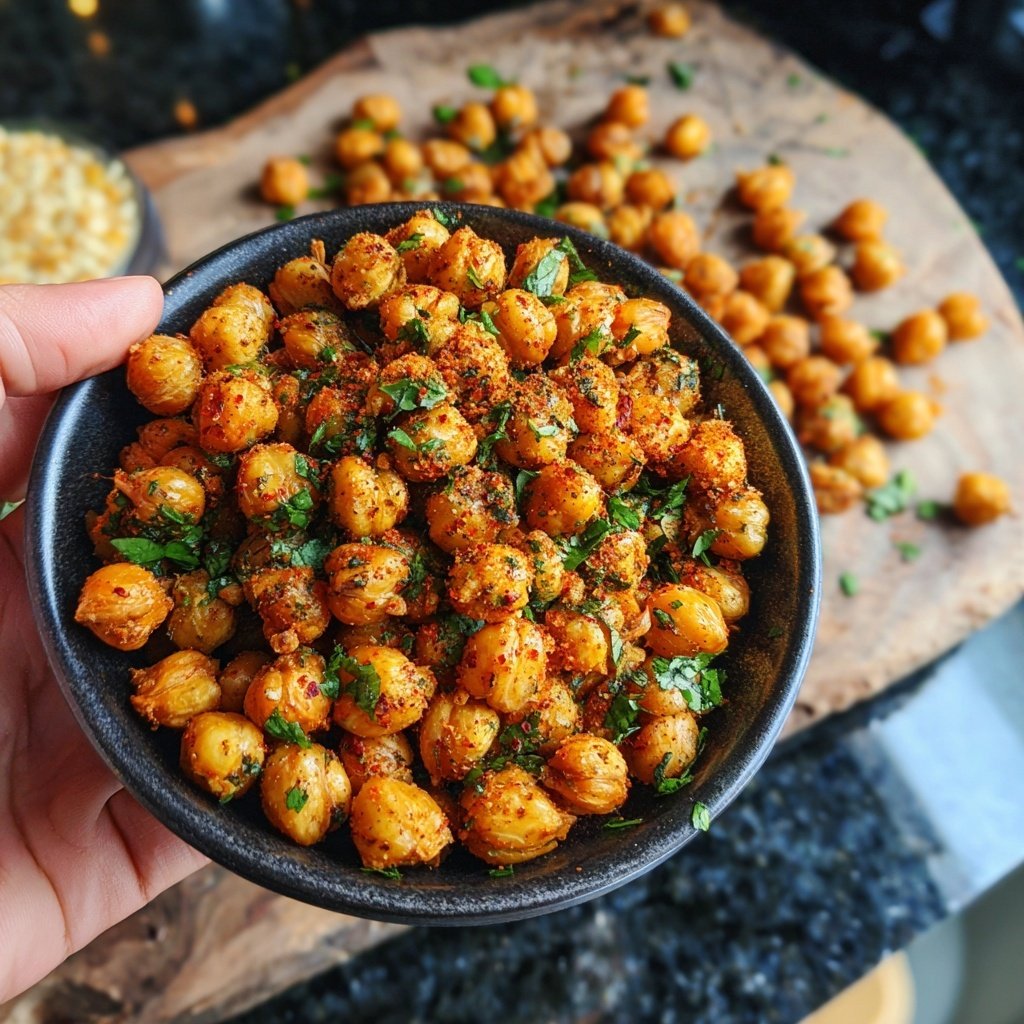
Garlic Roasted Chickpeas are versatile and can be enjoyed in multiple ways. They make a fantastic standalone snack, but you can also layer them on top of your favorite salads for added protein and crunch. I love tossing them into a grain bowl for that extra texture contrast. They pair beautifully with fresh greens or roasted vegetables, making them a great addition to your meal prep.
For a fun party treat, consider serving them alongside a variety of dips like hummus or tzatziki. The bold garlic flavor complements creamy dips perfectly, creating an exciting flavor profile for your guests. They can also be sprinkled over popcorn or used in place of croutons in soups to add an unexpected twist!
Common Mistakes to Avoid
A frequent pitfall while making Garlic Roasted Chickpeas is overcrowding the baking sheet. Ensure that the chickpeas are spread out in a single layer, as crowding can lead to steaming instead of roasting. If there's too much on the sheet, consider using a second one. Roasting at the correct temperature (400°F or 200°C) is essential for achieving that perfect crisp and avoiding burnt spots.
Another mistake is under-seasoning the chickpeas. They might seem like a lot of spices initially, but they tend to mellow during the roasting process. Don't be afraid to taste the raw seasoned chickpeas before roasting to gauge if you'd like to add more seasoning. It's a simple step that can elevate the overall flavor of your snack.
Questions About Recipes
→ Can I use dried chickpeas instead?
Yes, but you’ll need to soak and cook them before following the roasting steps.
→ How can I store leftovers?
Store any leftovers in an airtight container at room temperature for up to 3 days.
→ Can I make these ahead of time?
Absolutely! These chickpeas taste great for snacking later, just make sure to keep them stored correctly.
→ What other seasonings can I use?
Feel free to experiment with different spices like cumin, curry powder, or even cheese powder for a different flavor profile.
Garlic Roasted Chickpeas
What You'll Need
Ingredients
- 1 can (15 oz) chickpeas, drained and rinsed
- 2 tablespoons olive oil
- 3 cloves garlic, minced
- 1 teaspoon paprika
- 1/2 teaspoon salt
- 1/4 teaspoon black pepper
- Optional: 1/4 teaspoon cayenne pepper for heat
How-To Steps
Preheat your oven to 400°F (200°C). Spread the rinsed chickpeas on a clean kitchen towel and pat dry to remove excess moisture.
In a mixing bowl, combine the chickpeas with olive oil, minced garlic, paprika, salt, black pepper, and cayenne pepper (if using). Toss until the chickpeas are well coated.
Spread the seasoned chickpeas in a single layer on a baking sheet lined with parchment paper. Roast in the preheated oven for 25-30 minutes, stirring halfway through, until golden and crispy.
Once roasted, remove the chickpeas from the oven and let them cool for a few minutes. Enjoy them warm or at room temperature!
Extra Tips
- For extra flavor, try adding herbs like rosemary or thyme during the seasoning step, or toss in your favorite spice blend.
Nutritional Breakdown (Per Serving)
- Calories: 200 kcal
- Total Fat: 10g
- Saturated Fat: 1g
- Cholesterol: 0mg
- Sodium: 290mg
- Total Carbohydrates: 22g
- Dietary Fiber: 6g
- Sugars: 3g
- Protein: 10g