No Knead Dutch Oven Bread
Highlighted under: Comfort Ideas
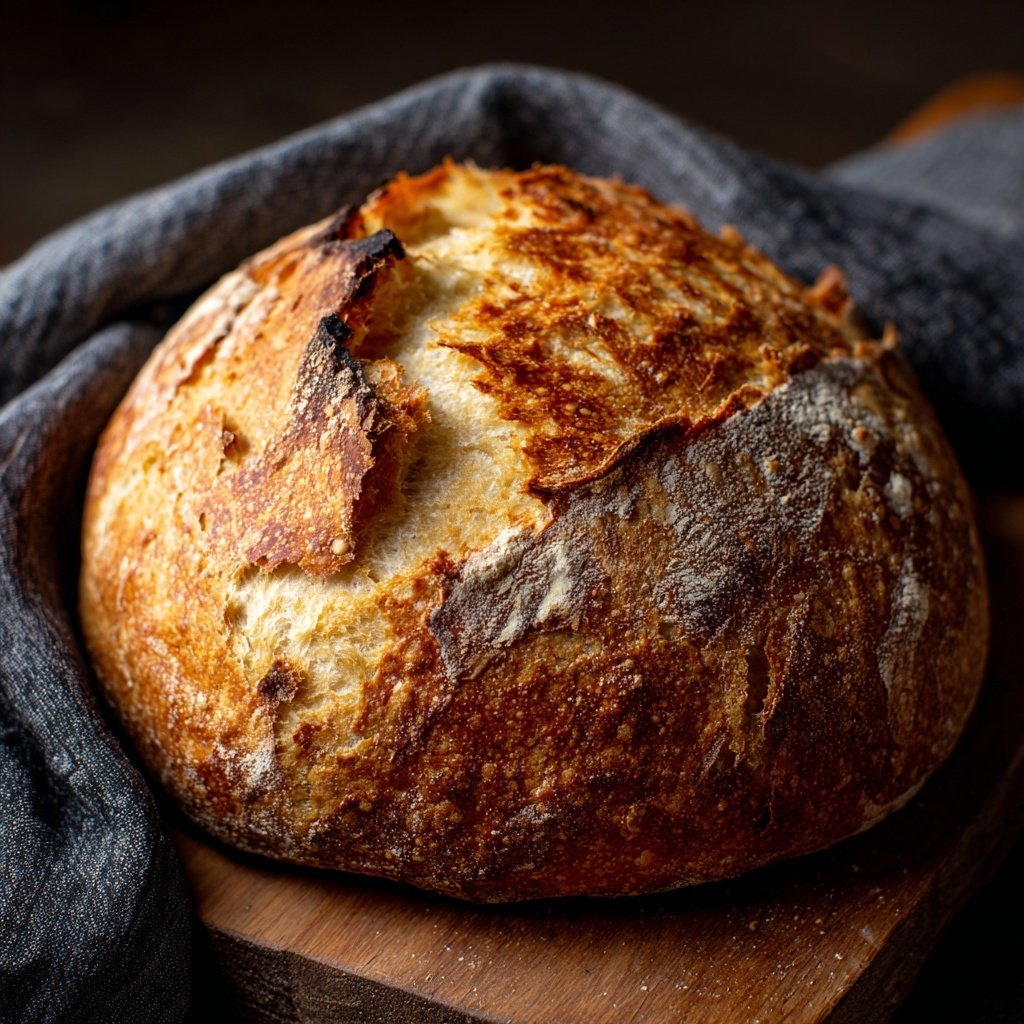
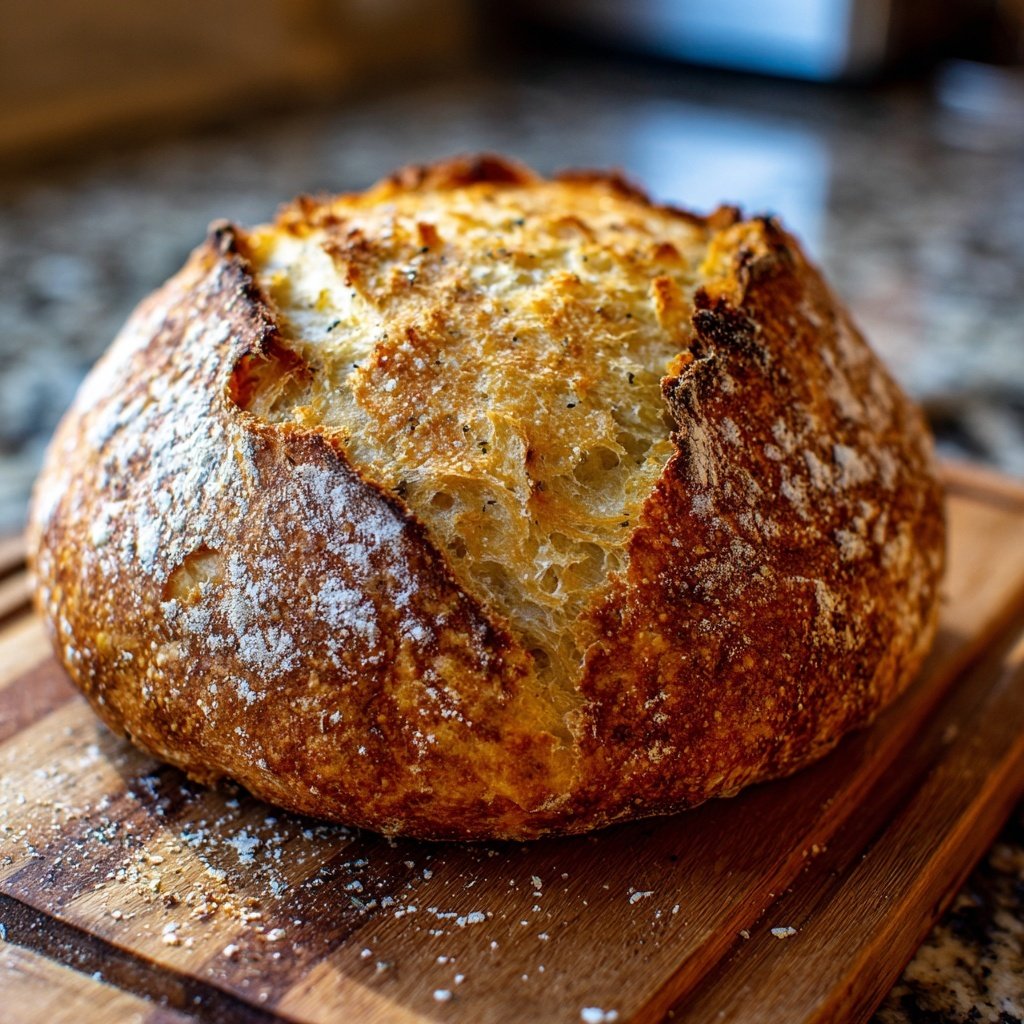
I have always loved the aroma of fresh bread wafting through the kitchen, and with this No Knead Dutch Oven Bread recipe, I can enjoy it without the fuss of kneading. Using simple ingredients and minimal effort, this bread rises beautifully while baking in a preheated Dutch oven. The result is a crusty exterior with a soft, airy crumb, perfect for slathering with butter or using as a base for sandwiches. It’s a game-changer for anyone looking to make artisan bread at home effortlessly.
I remember the first time I made this bread; my kitchen transformed into a cozy bakery filled with the delightful smell of fresh-baked goods. What amazed me most was how effortless the entire process was, yet the results were so impressive. I learned that letting the dough rest overnight allows the flavors to develop, which is vital for a rich, rustic loaf.
The Dutch oven plays a crucial role by creating a steamy environment that ensures the perfect rise and crust. I love to experiment with different add-ins and herbs to personalize the flavor, making this recipe a blank canvas for creativity!
Why You'll Love This Recipe
- No kneading required; just mix, rest, and bake.
- Crusty exterior with a soft and airy interior.
- Perfect for sandwiches, toast, or simply enjoying with butter.
- Versatile recipe that lets you add herbs, cheese, or seeds.
Understanding the Dough
The dough for this No Knead Dutch Oven Bread is very forgiving due to its high hydration level, which contributes to its airy texture. Since you’re not kneading, the gluten development relies on the long fermentation time. The high water content—1 1/2 cups compared to 3 cups of flour—creates a sticky dough that bubbles as it ferments, signaling that it's ready to bake. Watch for the dough to rise and become pockmarked with bubbles, a visual cue of its readiness and the intricate flavors developing inside.
Another key factor in this method is the use of instant yeast, which is more potent and faster-acting than active dry yeast. It ensures rapid fermentation, giving your dough that initial lift it needs without the lengthy rise times required for some other bread recipes. If you have only active dry yeast, you can substitute it by using a little more (about 2 teaspoons), though you may need to increase your prime rising time slightly to achieve the same bubbles and structure.
Baking in a Dutch Oven
Using a Dutch oven for baking bread is an essential part of this recipe, as it mimics a steam oven. When the dough is placed inside the preheated pot, the steam generated helps create a beautifully crusty exterior while keeping the inside moist. It’s crucial to preheat the Dutch oven for at least 30 minutes to achieve that hot environment; if it’s not adequately heated, the bread might not rise as expected, resulting in a denser loaf. A well-heated Dutch oven can also help the bread achieve golden-brown crusting, a sign of perfect baking.
After removing the lid for the final 15 minutes of baking, keep a close watch on your bread. The transition from pale to golden can be quick, and every oven is different. Rotate the pot if you notice uneven browning to ensure all sides achieve that rustic look. If your bread is browning too fast, consider lowering the temperature slightly to prevent burning, thereby allowing the interior to cook fully without losing its crusty charm.
Storing and Serving Suggestions
Once you've baked your No Knead Dutch Oven Bread, allow it to cool completely on a wire rack. This is essential; slicing too early can result in a gummy texture as the steam inside hasn’t fully evaporated. Once cooled, this bread can be stored at room temperature in a paper bag for up to 3 days. For longer storage, slice and freeze the bread in an airtight container for up to a month. When ready to enjoy, simply toast or warm up slices in the oven for a few minutes to regain that fresh-out-of-the-oven texture.
This bread is incredibly versatile. For a savory touch, consider adding herbs like rosemary or thyme directly into the dough during mixing. Cheese lovers might enjoy folding in grated cheese at the shaping stage. Additionally, topping your slices with avocado or smoked salmon can elevate a simple breakfast or lunch into something special. The crusty exterior and soft interior make it ideal for hearty sandwiches or toasting, perfect for complementing soups and salads as well.
Ingredients
Gather the following ingredients to make your No Knead Dutch Oven Bread:
Ingredients
- 3 cups all-purpose flour
- 1 1/4 teaspoons salt
- 1/2 teaspoon instant yeast
- 1 1/2 cups warm water
Make sure all ingredients are at room temperature for best results.
Instructions
Follow these steps to create your No Knead Dutch Oven Bread:
Mix the Dough
In a large bowl, combine the flour, salt, and instant yeast. Pour in the warm water and mix until no dry flour remains. The dough will be shaggy and sticky.
Let the Dough Rise
Cover the bowl with plastic wrap and let it sit at room temperature for 12 to 18 hours, until the surface is covered in bubbles and the dough has doubled in size.
Preheat the Oven
About 30 minutes before you are ready to bake, place a Dutch oven (with the lid) in your oven and preheat it to 450°F (230°C).
Shape the Dough
Turn the dough out onto a floured surface. Dust the top with flour and, with floured hands, gently shape it into a ball. Let it rest for 15 minutes.
Bake the Bread
Carefully remove the hot Dutch oven from the oven, remove the lid, and place the dough inside. Cover with the lid and bake for 30 minutes. Then, uncover and bake for an additional 15 minutes until golden brown.
Cool and Serve
Remove the bread from the Dutch oven and let it cool on a wire rack for at least 30 minutes before slicing.
Enjoy your homemade bread warm, or store it in an airtight container for up to a week.
Pro Tips
- For a more flavorful bread, consider adding herbs or cheese to the dough during mixing. Additionally, using a cast iron Dutch oven enhances the crustiness of the bread.
Troubleshooting Common Issues
One common issue with this no-knead method is if the dough doesn’t rise adequately. If your kitchen is cool, consider moving the bowl to a warmer area or beside a preheating oven. Temperature plays a crucial role in yeast activity, so a warmer environment can encourage better fermentation. Additionally, ensure your yeast is fresh—expired yeast will not produce the bubbly results you're looking for.
Another potential problem is encountering overly wet dough that you find difficult to handle. If your dough is too sticky to shape, this may be due to measuring errors or high humidity. In this case, dust your hands with more flour while working with it, or even a sprinkle of flour over the dough as you shape it can help manage stickiness during baking. It’s better to have a slightly tacky dough than to work in too much flour, which could toughen your bread.
Serving and Pairing Ideas
This No Knead Dutch Oven Bread pairs wonderfully with a wide range of spreads and toppings. Simply buttering a slice can be delightful, but consider mixing herbs into your butter for a more complex flavor. For a stunning appetizer, slice the bread into wedges and serve with a homemade dip or alongside a charcuterie board; the crusty texture holds up well against softer cheeses and meats.
Another fantastic way to serve this bread is by making bruschetta. Top slices of toasted bread with diced tomatoes, basil, and a drizzle of balsamic glaze for an easy and flavorful snack. This bread also shines when used for sandwiches; the crust can stand up to hearty fillings like roasted vegetables, meats, and sharp cheeses without getting soggy, making it a perfect choice for lunches or picnics.
Questions About Recipes
→ Can I use whole wheat flour?
Yes, you can replace some or all of the all-purpose flour with whole wheat flour, but the texture may be denser.
→ How can I store the bread?
Store the bread in an airtight container at room temperature for up to a week. You can also freeze it for longer storage.
→ Do I need a Dutch oven to make this bread?
While a Dutch oven is recommended for the best results, you can use any heavy pot with a lid that can withstand high heat.
→ Can I add ingredients like nuts or seeds?
Absolutely! Fold in nuts, seeds, or dried herbs into the dough during the mixing phase for added flavor and texture.
No Knead Dutch Oven Bread
What You'll Need
Ingredients
- 3 cups all-purpose flour
- 1 1/4 teaspoons salt
- 1/2 teaspoon instant yeast
- 1 1/2 cups warm water
How-To Steps
In a large bowl, combine the flour, salt, and instant yeast. Pour in the warm water and mix until no dry flour remains. The dough will be shaggy and sticky.
Cover the bowl with plastic wrap and let it sit at room temperature for 12 to 18 hours, until the surface is covered in bubbles and the dough has doubled in size.
About 30 minutes before you are ready to bake, place a Dutch oven (with the lid) in your oven and preheat it to 450°F (230°C).
Turn the dough out onto a floured surface. Dust the top with flour and, with floured hands, gently shape it into a ball. Let it rest for 15 minutes.
Carefully remove the hot Dutch oven from the oven, remove the lid, and place the dough inside. Cover with the lid and bake for 30 minutes. Then, uncover and bake for an additional 15 minutes until golden brown.
Remove the bread from the Dutch oven and let it cool on a wire rack for at least 30 minutes before slicing.
Extra Tips
- For a more flavorful bread, consider adding herbs or cheese to the dough during mixing. Additionally, using a cast iron Dutch oven enhances the crustiness of the bread.
Nutritional Breakdown (Per Serving)
- Calories: 220 kcal
- Total Fat: 1g
- Saturated Fat: 0g
- Cholesterol: 0mg
- Sodium: 470mg
- Total Carbohydrates: 46g
- Dietary Fiber: 2g
- Sugars: 0g
- Protein: 7g